
Generator Cooling System Parts: Components, Maintenance and Troubleshooting
The cooling system removes approximately 30% of the heat energy produced during combustion—without it, a diesel generator would seize within minutes of starting. Despite its critical function, cooling system maintenance is often neglected until overheating triggers an automatic shutdown. This guide covers every cooling system component with detailed specifications, failure analysis, and maintenance procedures that prevent thermal-related downtime.
Generator Cooling System Components
| Component | Function | Common Failure | Replacement Cost |
|---|---|---|---|
| Radiator Core | Heat exchanger dissipating coolant heat to atmosphere | External clogging, internal scaling, tube leaks | $1,200–$5,000 |
| Water Pump | Circulates coolant through engine block and radiator | Seal leakage, bearing failure, impeller erosion | $300–$1,200 |
| Thermostat | Regulates coolant flow to maintain operating temperature | Stuck open (overcooling) or closed (overheating) | $30–$150 |
| Cooling Fan | Forces air through radiator for heat rejection | Blade damage, clutch failure, motor burnout | $200–$1,500 |
| Fan Belt | Transfers crankshaft power to fan and water pump | Cracking, glazing, stretching, breakage | $15–$60 |
| Expansion Tank | Accommodates coolant thermal expansion and contraction | Cracking, cap seal failure, level sensor malfunction | $80–$400 |
| Coolant Hoses | Flexible connections between fixed components | Aging, cracking, bulging, internal collapse | $20–$80 each |
| Radiator Cap | Pressurizes system to raise boiling point | Spring fatigue, seal deterioration | $15–$40 |
| Block Heater | Maintains engine temperature in cold climates | Element burnout, thermostat failure | $150–$500 |
| Temperature Sensor | Provides coolant temperature data to control panel | Drift, open circuit, false shutdown trigger | $50–$200 |
Coolant Specification and Selection
| Coolant Type | Color (Typical) | Service Life | Best For |
|---|---|---|---|
| Conventional (IAT) | Green | 2 years / 2,000 hours | Older engines with cast iron blocks |
| Hybrid OAT (HOAT) | Yellow/Orange | 5 years / 5,000 hours | Modern diesel engines with mixed metals |
| Extended Life (ELC) | Red/Pink | 6–8 years / 8,000 hours | Heavy-duty diesel with supplemental additives |
| SCA Pre-Charged | Purple/Pink | 6 years with extender | Cavitation protection for wet-sleeve engines |
Critical mixing rule: Never mix different coolant types. Mixing IAT (green) with OAT (red) creates a gel that clogs radiator passages and destroys water pump seals. When changing coolant types, perform a complete flush with distilled water before filling with the new coolant.
Coolant-to-Water Mixing Ratio
- 50:50 mix: Standard for most climates. Freeze protection to -34°F (-37°C), boil protection to 265°F (129°C) with a 15 PSI cap.
- 60:40 mix: Maximum freeze protection to -62°F (-52°C). Never exceed 70% glycol—pure glycol freezes at a warmer temperature than a 60:40 mix and has poor heat transfer. Use only for extreme cold climates.
- 40:60 mix: Improved heat transfer for hot climates where freeze protection is not needed below 10°F (-12°C).
- Always use distilled or deionized water: Tap water contains minerals that form scale deposits, reducing heat transfer by up to 50% over time. Never use softened water—sodium ions accelerate aluminum corrosion.
Cooling System Maintenance Schedule
| Interval | Task | Details |
|---|---|---|
| Daily | Visual coolant level check | Verify level between MIN and MAX on expansion tank (check when cold) |
| Weekly | Inspect for leaks | Check under radiator, around water pump, hose connections |
| Monthly | Clean radiator exterior | Blow compressed air from engine side outward; remove debris from fins |
| Quarterly | Coolant concentration test | Use refractometer—not a float hydrometer; verify freeze point |
| Annually | Pressure test system | Pressurize to cap rating; hold 2 minutes; check for pressure drop and external leaks |
| Every 2 Years | Full coolant flush and replacement | Drain, flush with distilled water, refill with correct coolant mix |
| Every 2–3 Years | Replace thermostat | Preventive replacement avoids stuck-closed overheating events |
| Every 3 Years | Replace radiator cap | Spring fatigue causes pressure loss before visible failure |
Common Cooling System Failures and Diagnosis
Generator Overheating Under Load
When a generator overheats only under load but runs fine at no load, suspect: restricted airflow through a partially clogged radiator (external fins packed with dust/debris), internal scaling reducing heat transfer efficiency, a failing water pump impeller that slips under load, or a thermostat that opens incompletely. Diagnose by measuring temperature at the upper and lower radiator hoses—a difference exceeding 10°C (18°F) indicates insufficient flow.
Coolant Loss Without Visible Leaks
Mysterious coolant loss that leaves no puddle has three common causes. A leaking head gasket allows coolant into combustion chambers—look for white exhaust smoke and coolant odor. A cracked cylinder liner allows coolant into the oil pan—check for milky oil on the dipstick. An internal EGR cooler leak in modern engines can consume coolant invisibly. Any of these requires immediate professional diagnosis.
Water Pump Failure Warning Signs
The water pump weep hole exists specifically to provide early warning of seal failure. A few drops of coolant from the weep hole is acceptable; a steady drip or stream requires immediate pump replacement. Bearing noise—a growling sound that changes with engine RPM—indicates impending bearing seizure. Check for shaft play by attempting to wiggle the fan or pulley—any detectable movement means the bearings are worn beyond service limits.
FAQ
How do I know if my generator cooling system needs maintenance?
Warning signs include: rising coolant temperature trend (record readings at the same load for comparison), coolant loss requiring regular topping up, visible rust or scale in the expansion tank, coolant that appears cloudy or contains floating particles, and hoses that feel hard, brittle, or spongy when squeezed. Any of these warrants a full cooling system inspection.
Can I use automotive coolant in my generator?
Not always. Diesel generator engines—particularly those with wet-sleeve cylinder liners—require supplemental coolant additives (SCAs) to prevent cavitation erosion. Cavitation occurs when combustion pressure pulses cause vapor bubbles to form and collapse against cylinder liners at thousands of cycles per second, physically eroding the metal. Automotive coolant lacks these additives. Use heavy-duty diesel coolant specifically formulated for your engine type.
What happens if I run a generator with low coolant?
The thermostat housing is the highest point in the cooling system and the first component to lose coolant coverage. The thermostat then reads air temperature instead of coolant temperature, failing to open when the engine is actually overheating. This creates a dangerous scenario: the engine is overheating but the temperature gauge reads normal because the sensor is in air, not coolant. Never continue operating with the low coolant warning active.
How do I properly flush a generator cooling system?
Drain the system completely using the radiator drain cock and engine block drain plug(s). Flush with distilled water until the drain water runs clear. Add a commercial cooling system cleaner and run the engine per product instructions. Drain the cleaner, flush again with distilled water until clear. Refill with the correct coolant/distilled water mixture. Bleed air from the system per the manufacturer’s procedure—trapped air causes hot spots and inaccurate temperature readings.
Why does my generator radiator clog externally?
Generator radiators pull air from the engine side outward, sucking dust, pollen, leaves, and insects into the radiator fins. Generators in dusty, agricultural, or coastal environments experience accelerated clogging. Prevention includes: installing intake air filters on enclosure ventilation openings, cleaning the radiator exterior monthly with compressed air, and applying a radiator fin straightening comb to bent fins that block airflow.
Should I replace cooling system parts preventively?
Yes—cooling system preventive replacement is far cheaper than emergency failure repairs. Thermostats should be replaced every 2–3 years. Radiator caps every 3 years. Coolant hoses every 4–5 years regardless of apparent condition (internal degradation invisible externally). Fan belts every 2 years. Water pumps at the manufacturer’s recommended interval. The cost of preventive replacement is roughly 10% of repair costs after an overheating-induced failure.
Related Resources
- Speed Controllers — Engine speed stability affects water pump flow rates
- Sensors & Probes — Temperature sensors and monitoring systems
- Digital Control Panels — Temperature logging and overheat alarms
- Generator Maintenance Guide — Complete cooling system service schedules
- Generator Parts Buying Guide — Sourcing quality cooling components
- Generator Spare Parts FAQ — Cooling system spare inventory recommendations
- Generator Troubleshooting Guide — Overheating diagnostic flowcharts
Product Gallery
Boling
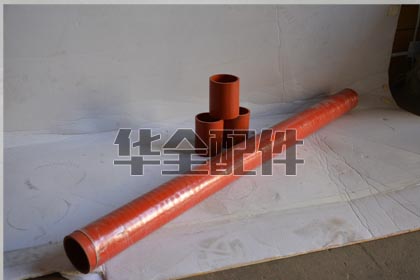
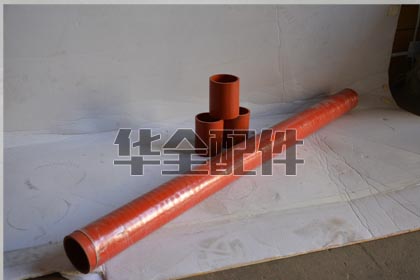
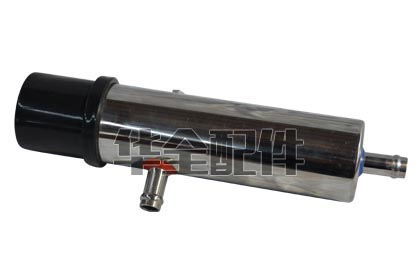
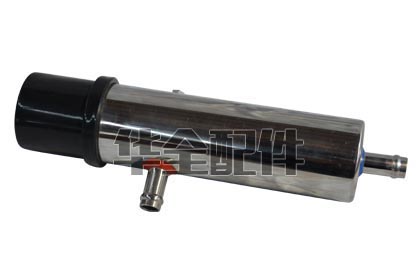
Cummins
Various
1. What components make up a generator cooling system?
A generator cooling system consists of: (1) Radiator/Cooling Core — fin-and-tube heat exchanger that rejects engine heat to ambient air; (2) Cooling Fan — engine-driven (belt or direct) or electric, pulling or pushing air through the radiator; (3) Water Pump — centrifugal pump circulating coolant through the engine block, cylinder head, and radiator; (4) Thermostat — temperature-controlled valve that regulates coolant flow to maintain optimal operating temperature (typically 82-95 degrees C); (5) Coolant Hoses and Pipes — connecting all components with reinforced rubber or silicone hoses; (6) Expansion Tank / Coolant Recovery Tank — accommodates coolant thermal expansion and maintains system pressure; (7) Fan Shroud — directs airflow through the radiator core for maximum cooling efficiency; (8) Fan Belts — transmit power from crankshaft pulley to fan and water pump; (9) Temperature Sensors and Gauges — provide feedback to the controller for high-temperature alarm and shutdown. All components must work together to maintain engine temperature within 5-10 degrees C of the thermostat rating under full load at maximum ambient temperature.
2. What are the signs of a failing water pump on a generator?
Water pump failure indicators: (1) Coolant leak from the pump weep hole (small hole on the underside of the pump housing) — a few drops are normal during break-in, but continuous dripping means the internal seal has failed. This is the most common failure mode; (2) Overheating at idle/low speed but normal temperature at rated speed — impeller clearance has increased due to bearing wear, reducing low-speed flow; (3) Grinding or squealing noise from the pump area — bearing failure. Stop the engine immediately — a seized water pump bearing can take out the fan belt and cause catastrophic overheating within minutes; (4) Visible wobble in the fan/pulley when the engine is running — bearing has excessive play; (5) Coolant contamination — if the seal fails and the weep hole is clogged, coolant can enter the bearing, washing out grease and causing rapid bearing failure; (6) Steam or coolant odor from the radiator when the engine is hot — suggests the pump is not circulating — check the upper radiator hose (should be hot) vs lower hose (should be cooler). Both cold means no circulation.
3. Which generator brands do HUAQUAN cooling system parts fit?
HUAQUAN supplies cooling system components compatible with: Cummins (4BT, 6BT, 6CT, ISB/QSB, ISC/QSC, ISL/QSL, ISM/QSM, KTA19/38/50, NTA855), Perkins (1100-4000 series), Deutz (912-2015 series), Volvo Penta (TAD series), MTU (Series 60, 2000/4000), Weichai (WP4-WP13, WD615/618, 12M series), Yuchai (YC4-YC6, YCK series), Shangchai (SC4-SC27), Weifang (4100-6126), SDEC, Lovol, Ricardo, and most Chinese-made diesel engines. We provide radiators (copper-brass and aluminum core options), water pumps (complete assemblies with gaskets), thermostats (various opening temperatures), fan belts, fan blades, fan shrouds, coolant hoses (straight and molded), expansion tanks, and complete cooling system overhaul kits. All components are tested to meet OEM pressure ratings (typically 7-15 PSI radiator cap pressure) and temperature specifications.
4. How do I maintain the generator cooling system for maximum service life?
Cooling system maintenance schedule: Daily/Pre-start — check coolant level in the expansion tank (engine cold). Low level indicates a leak — find it before starting. Check for visible leaks (green/orange/pink stains). Weekly — inspect fan belts for cracks, glazing, and proper tension (10-15mm deflection at midpoint under moderate thumb pressure). Monthly — check radiator fins for debris, bent fins, and blockage. Clean with compressed air (from engine side outward, MAX 30 PSI to avoid bending fins) or low-pressure water. Never use a pressure washer on radiator fins. Quarterly — pressure test the radiator cap (should hold rated pressure). Test coolant freeze point and pH. Semi-annually — inspect all hoses for soft spots, swelling, and cracking. Squeeze hoses — they should feel firm, not spongy. Annually — flush and replace coolant (conventional coolant every 2 years/2,000 hours, ELC every 6 years/6,000 hours). Replace thermostat and radiator cap as preventive maintenance. Replace all hoses and belts every 3-4 years regardless of appearance.
5. What type of coolant should I use in my generator?
Coolant selection depends on engine manufacturer requirements: Conventional (Inorganic Acid Technology / IAT) — green in color, contains silicates and phosphates for corrosion protection. Service life: 2 years or 2,000 hours. Required for older engines with copper/brass radiators — the silicates protect copper from corrosion. Extended Life (Organic Acid Technology / OAT) — orange/red/pink in color, uses organic acid corrosion inhibitors. Service life: 6 years or 6,000 hours. Better for aluminum components (modern radiators, cylinder heads). Never use in engines with copper/brass — the organic acids attack copper. Hybrid OAT (HOAT) — yellow/gold in color, combines OAT with silicates. Service life: 5 years or 5,000 hours. Universal compatibility. NEVER mix IAT and OAT — the chemical reaction forms a gel that clogs radiator tubes. If switching types, a complete flush with distilled water is mandatory. For stationary generators in freezing climates, use a 50/50 coolant/water mix (freeze protection to -37 degrees C). For tropical climates, 40/60 is acceptable. Always use distilled or deionized water — tap water minerals cause scale buildup.
6. What causes a generator to overheat and how do I troubleshoot it?
Overheating troubleshooting checklist: (1) Check coolant level — the most common cause. Low coolant from a leak (hose, radiator, water pump, head gasket) reduces heat transfer capacity; (2) Thermostat stuck closed — the upper radiator hose stays cold while the engine overheats. Remove and test thermostat in a pot of water with a thermometer — should begin opening at rated temperature and be fully open 10-15 degrees C above; (3) Radiator external blockage — dirt, debris, bent fins, or recirculation of hot air. Clean fins and check that fan shroud is intact — without the shroud, the fan recirculates hot engine compartment air instead of pulling cool air through the radiator; (4) Fan belt slipping — glazed or loose belt reduces fan speed and water pump speed. Check tension and replace if glazed; (5) Water pump failure — impeller erosion or broken shaft. Check for circulation by feeling the upper radiator hose — should get hot quickly as thermostat opens; (6) Internal radiator clogging — mineral scale or sludge in the tubes reduces heat transfer. Requires professional radiator flush or rodding; (7) Combustion gas in coolant — head gasket leak pressurizes the cooling system. Chemical block test kit detects exhaust gas in the radiator. Bubbles in the expansion tank with the engine running confirm this.
7. How do I select the right radiator for my generator set?
Radiator selection criteria: (1) Heat rejection requirement — the engine’s heat rejection to coolant (kW or BTU/hr) at rated power, provided by the engine manufacturer. The radiator must dissipate this heat at the maximum expected ambient temperature (typically 45-50 degrees C for tropical installations); (2) Core type — copper-brass (traditional, repairable, heavier) vs aluminum (lighter, better heat transfer per kg, not field-repairable). Aluminum is now standard for most generator sets under 2MW; (3) Core thickness — more rows = higher heat rejection but higher air resistance. 4-6 rows typical for generators; (4) Fan drive — engine-driven (most reliable, parasitic load 5-10% of engine power) vs electric (independent of engine speed, programmable, but adds electrical load and single point of failure); (5) Mounting — skid-mounted (radiator mounted on the generator base frame) vs remote (radiator in a separate location with long coolant pipes and an auxiliary pump). Remote mounting required for: installations in tight rooms without adequate airflow, installations requiring lower noise (radiator fan is a major noise source), or where hot air discharge must be ducted outside; (6) Altitude derating — at 2,000m altitude, air density is ~80% of sea level, reducing radiator cooling capacity by 15-20%. Oversize accordingly. HUAQUAN application engineers will size the correct radiator for your specific engine and site conditions.
8. What is the role of the fan shroud and why is it critical?
The fan shroud is a precisely fitted enclosure that channels airflow from the fan through the ENTIRE radiator core surface. Without a shroud: (1) The fan pulls air from the path of least resistance — around the radiator edges — bypassing 30-50% of the core area, dramatically reducing cooling efficiency; (2) The fan recirculates hot engine compartment air instead of pulling fresh air through the radiator, causing a heat buildup spiral; (3) The fan tip clearance creates vortices that waste power without moving air. The shroud eliminates tip losses. A properly designed shroud has: (1) A tight fit around the fan — tip clearance of 1-2% of fan diameter (e.g., 6-12mm for a 600mm fan); (2) An aerodynamic inlet bell/venturi that smooths airflow into the fan; (3) Coverage of the ENTIRE radiator core — no gaps at the corners; (4) Robust mounting that doesn’t vibrate or crack. If the shroud is damaged, cracked, or missing, replace it immediately — the generator may run 10-20 degrees C hotter without it, pushing it into the danger zone on hot days. This is one of the most overlooked maintenance items.
9. How do I bleed air from the cooling system after a coolant change?
Air in the cooling system causes hot spots, erratic temperature readings, and potential head gasket failure from localized overheating. Bleeding procedure: (1) Fill the system slowly — pouring coolant too quickly traps air. Fill to the MAX mark on the expansion tank; (2) Open any air bleed valves — many engines have bleed screws on the thermostat housing and/or the cylinder head. Leave them open until a steady stream of coolant (no bubbles) flows out; (3) Leave the radiator cap OFF and start the engine. Run at idle — the water pump will push air toward the radiator fill neck; (4) Watch for the thermostat to open (upper hose gets hot, coolant level in the radiator drops suddenly). Top up as the level drops; (5) Squeeze the upper and lower radiator hoses repeatedly — this manually pumps trapped air toward the radiator; (6) When the coolant level stabilizes, the upper hose is consistently hot, and no bubbles appear at the fill neck, install the radiator cap; (7) Fill the expansion tank to the MAX line; (8) Run the engine at rated speed for 10 minutes, then shut down and let it cool completely. Recheck the expansion tank level — it will drop as the system draws coolant in to replace expelled air. Top up as needed. Repeat this cool-down check 2-3 times until the level stabilizes.
10. What causes coolant loss with no visible leak?
Hidden coolant loss causes: (1) Internal head gasket leak — combustion gases enter the cooling system through a failed head gasket, pressurizing it and pushing coolant out through the radiator cap/overflow. Chemical block test (blue liquid turns yellow = exhaust gas present) confirms; (2) Cracked cylinder head or block — coolant leaks into the combustion chamber and is burned (white smoke from exhaust, sweet smell). Check for coolant contamination in the oil (milky oil on dipstick = coolant in oil); (3) EGR cooler leak (on EGR-equipped engines) — coolant leaks into the exhaust stream through a cracked EGR cooler. Look for white smoke and coolant loss without other symptoms; (4) Radiator cap not holding pressure — lowers the boiling point, causing coolant to boil off during high-load operation. Pressure test the cap; (5) Small external leak that evaporates before dripping — coolant on a hot engine surface flashes to steam instantly. Look for white/green residue trails (dried coolant) on the engine block, hoses, and radiator tanks — these are telltale signs of small leaks; (6) Overflow tank siphon — if the overflow hose is cracked or disconnected, coolant is pushed out during thermal expansion but not drawn back during cool-down, resulting in a progressive loss. A pressure test of the ENTIRE system (radiator, cap, hoses, block) is the definitive diagnostic — pressurize to 15 PSI and watch for pressure drop over 15-30 minutes.
11. How do I winterize the generator cooling system?
Winterization for sub-freezing operation: (1) Coolant concentration — verify freeze protection with a refractometer (not a floating-ball hydrometer — inaccurate). 50/50 ethylene glycol/water protects to -37 degrees C. 60/40 protects to -52 degrees C. Never exceed 70% glycol — heat transfer degrades significantly above 60%; (2) Supplemental Coolant Additives (SCA) — for wet-sleeve engines (Cummins, Detroit Diesel), SCA levels must be maintained to prevent cavitation erosion of cylinder liners. Test with an SCA test strip and add as needed; (3) Engine block heater — 1,500-3,000W immersion heater in the water jacket, thermostatically controlled to maintain 30-40 degrees C. Reduces cold-start wear by 50-70% and ensures immediate full-load acceptance; (4) Battery — cold reduces CCA by 30-50%. Ensure battery is fully charged and consider a battery heating pad; (5) Thermostat — verify correct temperature rating. A thermostat that’s stuck partially open prevents the engine from reaching operating temperature in cold weather, causing wet-stacking and carbon buildup; (6) Radiator shutters or winter fronts — restrict airflow to help the engine reach operating temperature faster. NEVER fully block the radiator — leave at least 30% open area; (7) Check radiator hoses for cold-weather cracking — rubber hardens and becomes brittle below -20 degrees C. Silicone hoses remain flexible and are recommended for arctic installations.
12. What is cavitation erosion and how does it affect the cooling system?
Cavitation erosion (liner pitting) is a destructive phenomenon specific to wet-sleeve diesel engines (cylinder liners in direct contact with coolant). Mechanism: the piston slap during combustion creates high-frequency vibration of the cylinder liner. This vibration creates tiny vacuum bubbles in the coolant at the liner surface. When these bubbles collapse (implode), they generate microscopic shock waves that physically erode the liner material. Over thousands of hours, this erosion creates pits that can penetrate completely through the liner, allowing coolant into the cylinder (hydrolock risk). Prevention: (1) Supplemental Coolant Additives (SCA) — create a protective film on the liner surface that absorbs the shock wave energy. SCA concentration must be maintained per the engine manufacturer’s specification (typically 1.5-3.0 units on a test strip); (2) Use pre-charged coolant with SCA already added (fully formulated antifreeze for diesel engines); (3) Test coolant SCA levels at every oil change and add SCA as needed; (4) Conventional green coolant requires more frequent SCA testing than OAT coolant; (5) A coolant filter with SCA charge (spin-on filter pre-loaded with SCA pellets) provides continuous automatic replenishment. Cavitation damage is invisible until the liner fails — it cannot be seen during routine inspection. This is why regular coolant testing and SCA maintenance is not optional on wet-sleeve engines.
13. How do I test the thermostat without removing it?
Non-removal thermostat testing: (1) Start the engine cold and let it idle. Monitor the temperature gauge and feel the upper radiator hose (the large hose from the thermostat housing to the radiator top); (2) The upper hose should stay COLD for the first few minutes. If it gets warm immediately, the thermostat is stuck open — this causes slow warm-up and cold-weather issues; (3) As the temperature gauge approaches the thermostat’s rated opening temperature (typically 82-88 degrees C), the upper hose should suddenly become HOT as the thermostat opens. This transition should be fairly abrupt — a gradual warming suggests the thermostat is partially stuck open; (4) If the gauge continues to climb past the normal range (95+ degrees C) and the upper hose is still cold, the thermostat is stuck closed. Shut down immediately; (5) Use an infrared thermometer to measure the temperature of the thermostat housing and the upper hose — the temperature difference should be less than 5 degrees C once the thermostat is fully open; (6) For a definitive test, bring the engine to operating temperature, then shut down. The upper hose should feel consistently hot along its entire length — cold spots indicate poor circulation. Remove and test in water with a thermometer if any doubt exists — the part is inexpensive, failure is catastrophic.
14. What is the difference between a pusher and puller fan configuration?
Puller fan (suction): mounted on the engine side of the radiator, pulls air through the core. Advantages: More efficient — the fan works with natural convection (hot air rises), the air entering the radiator is cool ambient air (not pre-heated by the engine), and the fan is in the cooler air stream (longer bearing/motor life). The engine itself blocks some radiation of noise. Standard for 95%+ of generator installations. Pusher fan (blower): mounted on the ambient air side of the radiator, pushes air through the core. Used only when: (1) The engine compartment is too tight for a puller fan (space constraints); (2) The radiator is remotely mounted with the fan on the inlet side; (3) Special noise containment enclosures where the fan must be on the cool side. Disadvantages: Pre-heats the intake air by blowing it over the hot engine first, reducing radiator performance. The fan motor runs in the hot air stream. Less efficient overall — requires 10-15% more fan power for the same cooling. HUAQUAN supplies both configurations with full mounting hardware.
15. How do I properly pressure test the cooling system?
Cooling system pressure test procedure: (1) Engine COLD — testing hot can be dangerous (scalding risk) and gives false readings from thermal expansion; (2) Remove the radiator cap and attach a cooling system pressure tester (hand pump with gauge) to the radiator fill neck. Pump to the pressure stamped on the radiator cap (typically 7-15 PSI / 0.5-1.0 bar); (3) Watch the gauge for 15-30 minutes. Any pressure drop = leak. A drop of more than 1 PSI in 15 minutes is significant; (4) While pressurized, inspect all hoses, connections, freeze plugs, water pump, radiator tanks, and radiator core for coolant seeping. Use a flashlight and mirror for hidden areas; (5) Test the radiator cap separately — most pressure testers have an adapter. The cap should open at its rated pressure and reseal above 80% of that pressure; (6) If pressure drops but no external leak is visible, suspect an internal leak: remove the oil dipstick and smell for coolant (sweet smell). Remove the spark plugs/glow plugs and look for wet cylinders. A chemical block test kit checks for exhaust gas in the coolant; (7) Release pressure slowly before removing the tester. The system should hold test pressure indefinitely if there are no leaks — even a tiny pinhole will show a pressure drop.