
Generator Engine Belts — Complete Guide
Engine belts are deceptively simple components that transfer mechanical power from the crankshaft to essential accessories: the cooling fan, water pump, alternator (battery charging), and sometimes the power steering pump on larger units. A snapped belt can cause rapid overheating (if driving the water pump), battery discharge (if driving the alternator), or both. Belts are consumable wear items that must be inspected regularly and replaced on schedule.
Generator Belt Types
| Belt Type | Profile | Typical Width | Power Capacity | Application |
|---|---|---|---|---|
| Classical V-Belt (A, B, C Sections) | Trapezoidal cross-section; wedge action in pulley groove | A: 13mm / B: 17mm / C: 22mm top width | A: 1-5 kW / B: 3-15 kW / C: 10-40 kW per belt | Most common on generators 10-500 kW; single or multiple belts |
| Wedge / Narrow V-Belt (3V, 5V, 8V) | Deeper, narrower profile with steeper side angle | 3V: 10mm / 5V: 16mm / 8V: 25mm top width | Higher than classical of similar width; 3V replaces A/B; 5V replaces B/C | Modern engines; higher power density; longer life than classical |
| Cogged / Notched V-Belt (AX, BX, CX) | V-belt with transverse notches on inner surface | Same as classical sections | Same as classical but runs cooler | Smaller pulley diameters; runs cooler at high RPM; more flexible |
| Poly-V / Serpentine (PK, J, L, M Ribs) | Flat belt with longitudinal ribs; single belt drives multiple accessories | Varies by rib count: 4-12 ribs common | High; single belt can drive all accessories | Modern engines 30 kW+; single belt tensioned by automatic tensioner |
| Synchronous / Timing Belt | Toothed belt; positive engagement; no slip | Varies by pitch (8mm, 9.5mm, 14mm common) | No power limit in typical application | Only for camshaft timing; never used for accessory drive on generators |
Belt Failure Modes and Diagnosis
| Symptom | Cause | Action |
|---|---|---|
| Cracking on inner (ribbed) surface | Normal aging; heat cycling; belt past service life | Replace belt. Multiple cracks per inch = immediate replacement. |
| Glazing (shiny, hard sidewalls) | Belt slipping in pulley; insufficient tension; worn pulley grooves | Check tension with gauge; inspect pulleys for wear. Replace belt — glazed belts have permanently reduced friction. |
| Squealing noise (especially at start or load change) | Belt slippage; usually from insufficient tension or worn belt | Check and adjust tension. If belt is worn, replace. Do not use belt dressing — it masks the problem and attracts dirt. |
| Edge wear / fraying | Pulley misalignment; belt rubbing against guard or bracket | Check pulley alignment with straightedge or laser alignment tool. Correct misalignment and replace belt. |
| Bottom of belt worn (belt bottoms out in pulley) | Worn pulley groove — belt rides on groove bottom instead of sidewalls | Replace pulley. A belt that bottoms out has no drive friction. Continuing to run will destroy new belts quickly. |
| Belt breakage (snapped) | Foreign object in drive; severe misalignment; belt severely overtightened; sudden accessory seizure | Inspect all driven accessories for free rotation before installing new belt. Check pulleys for damage. |
Frequently Asked Questions
1. How tight should my generator belts be?
Use a belt tension gauge — guessing by feel is unreliable. For V-belts, the rule of thumb is 10-15mm deflection when pressing with moderate force (~10 kg per belt) at the midpoint of the longest span between pulleys. For serpentine/poly-V belts with automatic tensioners, the tensioner’s indicator mark should fall within the acceptable range on the tensioner housing. Too tight = premature bearing failure in accessories; too loose = belt slip and rapid wear.
2. How often should generator belts be replaced?
Inspect every 250 hours or monthly during exercise runs. Replace every 2-3 years or 1000-2000 hours, whichever comes first, regardless of appearance. Belts in standby generator service degrade from age, heat, and ozone exposure even without runtime. Always keep a spare belt set with the generator — a broken belt during an extended outage is a preventable shutdown.
3. Should I replace all belts at once even if only one is damaged?
Yes, for matched belt sets (multiple belts on the same drive). V-belts in matched sets wear together and share load equally. Replacing only one belt will cause the new belt to carry most of the load because it will be slightly shorter/tighter than the worn belts — leading to rapid failure. Always replace matched V-belt sets as a complete set from the same manufacturer. Serpentine belts are single belts — just replace the one.
4. Can I use an automotive belt on my generator engine?
If the part numbers match exactly, yes — many generator engines share belts with industrial/automotive applications. However, generator service places unique demands: belts may sit stationary for months (taking a “set” in the bent position over pulleys) then run continuously for days during an outage. Generator-specific belts sometimes use compounds optimized for standby service with better set-resistance. When available, use the generator manufacturer’s specified belt.
5. What happens if a belt breaks while the generator is running?
If the belt drives the water pump and/or fan: the engine will overheat within minutes. Most modern generators have a high coolant temperature shutdown — but the engine may still be damaged if the overheat is rapid. If the belt drives only the alternator (battery charging): the generator will continue running but the battery will discharge. The engine will shut down when battery voltage drops below the controller’s minimum — typically within a few hours. Either scenario leaves you without power.
6. How do I check pulley alignment without special tools?
Place a straightedge (metal ruler or level) across the face of both pulleys. The straightedge should contact all four points (two edges on each pulley) simultaneously. If there is a gap at any point, the pulleys are misaligned. For a more precise check, use a laser alignment tool (available for $50-150 from industrial suppliers). Misalignment as small as 1 degree can reduce belt life by 50% or more.
Related Articles
- Generator Cooling System Parts
- Diesel Engine Spare Parts for Generators
- Generator Engine Parts — Systems Overview
- Complete Generator Maintenance Guide
- Generator Water Pumps Guide (placeholder)
- Generator Batteries and Chargers
- Generator Troubleshooting Guide
Product Gallery
Cummins
Various
Weichai
Frequently Asked Questions
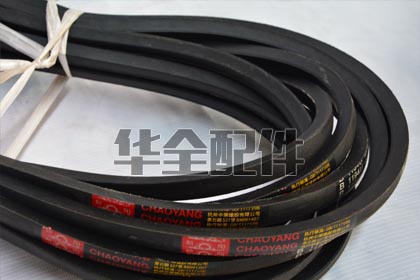
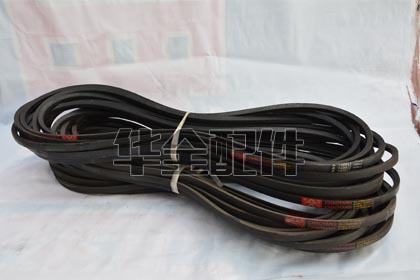
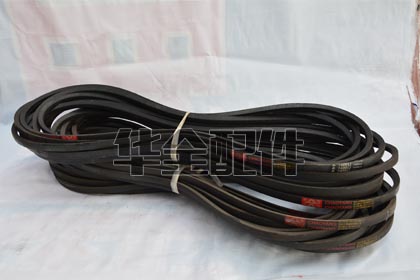
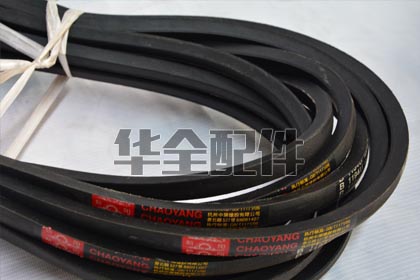
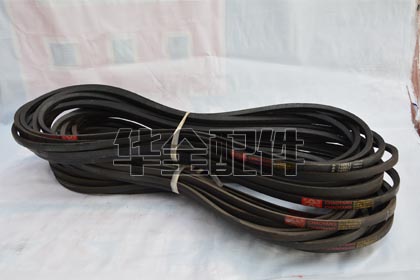
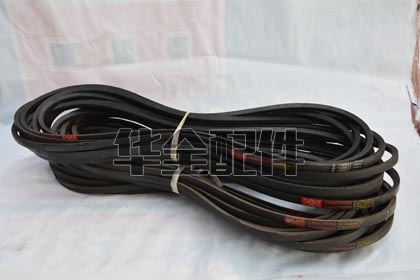
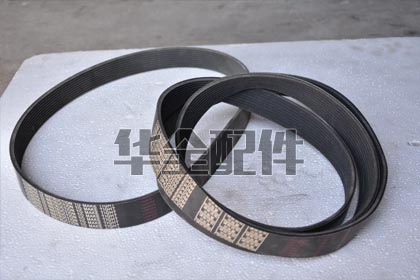
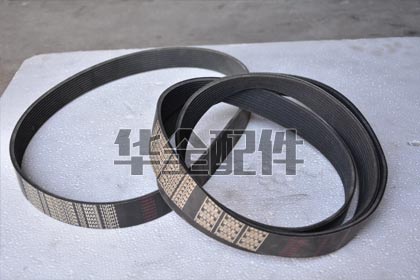
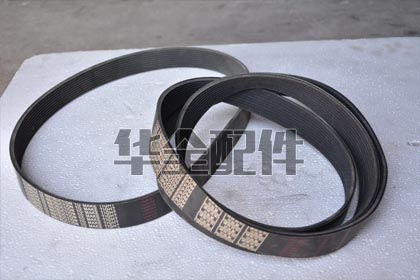
Diesel generator engines use three main belt types: (1) V-belts (wedge belts): the traditional belt design with a trapezoidal cross-section that wedges into a matching groove on the pulley. Single V-belts are used on smaller engines (under 50kW) to drive the alternator and water pump. Multiple V-belts (matched sets of 2, 3, or 4) are used on larger engines where more power transmission is needed. V-belt profiles: classical (A, B, C, D sections — the letter indicates width and depth) and wedge (SPZ, SPA, SPB, SPC — deeper wedge for more power transmission per belt. Example: B-42 = classical B-section, 42-inch effective length); (2) Serpentine belts (multi-rib/poly-V): a wide, flat belt with multiple longitudinal ribs on the inner side, running on grooved pulleys. A single serpentine belt drives all accessories (alternator, water pump, fan, sometimes the air conditioning compressor). Advantages: simpler installation (one belt vs. multiple), automatic tensioner maintains proper tension, and better power transmission efficiency. Common on modern engines (2000+); (3) Timing belts (cogged/synchronous belts): a toothed belt that drives the camshaft (and often the injection pump) from the crankshaft, maintaining precise timing. Unlike V-belts and serpentine belts, a timing belt has teeth that engage matching teeth on the pulleys — it does NOT rely on friction. If a timing belt fails (breaks or jumps teeth), the engine experiences catastrophic valve-to-piston contact (interference engine) and requires a major overhaul. Timing belts are typically on smaller engines (under 50kW) — most medium/large diesel engines use gear-driven camshafts and injection pumps. HUAQUAN stocks all three belt types in OEM-equivalent quality for all major engine brands.
Belt identification steps: (1) Look for the belt part number printed on the belt outer surface — most quality belts have the manufacturer part number and the industry-standard size designation heat-stamped or printed. Clean the belt with a rag to make the printing legible; (2) If the belt is too worn to read the number: measure the belt. For V-belts: measure the outside circumference (wrap a flexible tape measure or string around the outside of the belt while it is still installed, mark, and measure). Also measure the top width of the belt in millimeters or inches. Example: a belt with 17mm top width and 1,200mm circumference is an SPA 1200 or B-47; For serpentine belts: count the number of ribs and measure the effective length (the length along the centerline of the ribs). For timing belts: count the number of teeth (mark one tooth, rotate and count), measure the tooth pitch (distance between two adjacent tooth centers, typically 8mm, 9.525mm/3/8 inch, or 12.7mm/1/2 inch), and measure the belt width; (3) Cross-reference: HUAQUAN can cross-reference belts by engine make/model, belt dimensions, and manufacturer part numbers. Provide as much information as possible — a belt that is 5mm off in length will not tension correctly; (4) Signs of wear requiring replacement: cracks on the inner (ribbed/V) surface, glazing (shiny, hard surface that slips), fraying on the edges, chunks of rubber missing, and belt squeal (indicates slipping due to wear or improper tension). Replace belts at the manufacturer recommended interval even if no visible wear is present — catastrophic belt failure takes out the cooling system (overheat) and charging system (battery discharge).
Belt tensioning: (1) For manually tensioned belts (V-belts, some serpentine belts): use a belt tension gauge (a tool that measures the force required to deflect the belt a specific distance). General rule: for V-belts, the deflection should be 1/64 inch (0.4mm) per inch of span length. A belt with a 16-inch span should deflect 1/4 inch (6mm) under moderate thumb pressure (approximately 10-15 lb / 45-70 N). For serpentine belts: deflection should be 1/2 inch (13mm) under 10-20 lb (45-90 N) of force. A tension gauge provides precise, repeatable results — highly recommended; (2) Thumb method (if no gauge): press firmly with your thumb midway between two pulleys on the longest span. The belt should deflect approximately 1/2 inch (13mm). It should feel tight but not rigid. A belt that deflects more than 3/4 inch (19mm) is too loose and will slip. A belt that barely deflects is too tight and will overload the bearings; (3) Overtensioning: a belt that is too tight increases the radial load on the alternator, water pump, and crankshaft bearings — leading to premature bearing failure. The alternator front bearing is particularly susceptible. The belt should not ‘sing’ or produce a high-pitched whine at speed — this indicates excessive tension; (4) Automatic tensioners (most modern serpentine belts): no adjustment is required — the spring-loaded tensioner maintains correct tension. Check the tensioner wear indicator: most tensioners have a mark on the stationary housing and a pointer on the moving arm. If the pointer is outside the wear range (typically marked as a zone between two lines or with a ‘replace’ indicator), the tensioner or belt is worn out. A noisy tensioner (squeaking, rattling) indicates a worn bearing — replace the entire tensioner assembly, not just the pulley; (5) After tensioning a new belt, run the engine for 5-10 minutes, then re-check the tension — new belts stretch slightly during break-in.
Timing belt failure consequences: (1) Interference engine — most diesel engines are interference designs, meaning the valves and pistons occupy the same physical space at different times. The timing belt ensures they never occupy that space simultaneously. When the timing belt breaks, the camshaft stops rotating, but the crankshaft (driven by the flywheel inertia or the starter motor if the operator attempts to restart) continues rotating. Result: the pistons strike the open valves, bending valve stems, cracking valve heads, damaging the piston crown, and potentially cracking the cylinder head or breaking connecting rods; (2) Damage assessment: at minimum: bent valves (all cylinders) and damaged valve guides. Typically: bent valves, damaged valve seats, cracked or holed pistons, damaged connecting rods. Worst case: a broken valve head breaks off and bounces in the cylinder, destroying the piston, cylinder head, liner, and possibly the connecting rod and crankshaft — essentially totaling the engine; (3) Prevention: follow the manufacturer timing belt replacement interval RELIGIOUSLY. Typical interval: 1,500-2,000 hours or 3-5 years, whichever comes first. Age matters — the belt rubber and reinforcing cords degrade over time even if the engine has low hours. A 10-year-old belt with 500 hours is a ticking time bomb; (4) What to replace during a timing belt service: the timing belt, timing belt tensioner and idler pulleys (the bearings fail before the belt — a seized idler causes the same catastrophic failure as a broken belt), water pump (if driven by the timing belt — since you are already in there, replace it proactively), and front crankshaft and camshaft seals (accessible with the timing cover off); (5) After timing belt failure: BEFORE installing a new belt and attempting to start the engine, perform a leak-down test to identify which cylinders have bent valves. Borescope inspection through the injector holes can reveal piston and cylinder wall damage. In most cases, a professional overhaul is required.
Premature belt wear causes: (1) Pulley misalignment — the most common cause of rapid belt wear. If the driving and driven pulleys are not in the same plane (one is tilted or offset relative to the other), the belt enters the pulley at an angle, scrubbing the side(s) and V-groove. Symptoms: wear on one side of the belt only, belt rolling over in the pulley, or belt thrown off. Check alignment with a straightedge across the pulley faces — the straightedge should contact all four points (both edges of both pulleys). Misalignment typically occurs after component replacement (alternator not shimmed correctly, water pump mounting flange not flush); (2) Incorrect tension — a loose belt slips on the pulleys, generating heat that hardens and glazes the belt surface. A glazed belt looks shiny and feels hard. The heat also causes the rubber to crack prematurely. An overtightened belt stretches the reinforcing cords and overloads the bearing; (3) Worn pulleys — the V-groove should have a sharp, defined profile. A worn pulley has a widened, rounded V-groove — the belt bottoms out in the groove (the bottom of the belt contacts the bottom of the pulley instead of the sides wedging in the groove), losing grip. The pulley must be replaced, not just the belt; (4) Oil or coolant contamination — a leaking front crankshaft seal, timing cover gasket, or water pump weephole drips oil or coolant onto the belt. The fluid attacks the rubber, causing swelling, softening, and loss of tensile strength; (5) Heat — the engine compartment ambient temperature can exceed 80-100 degrees C under load, especially in an enclosed generator canopy with inadequate ventilation. High heat rapidly ages rubber. Ensure all cooling air intake and exhaust openings are unobstructed and the generator canopy is properly ventilated.