
Generator Gaskets and Seals — Complete Guide
Gaskets and seals may be among the least expensive components in a generator engine, but their failure can cause catastrophic damage. A failed head gasket can mix coolant and oil, destroying bearings. A leaking crankshaft seal can drain oil unnoticed until the engine seizes. Understanding gasket types, materials, failure modes, and proper installation techniques is essential for reliable generator operation and successful engine rebuilds.
Critical Engine Gaskets and Seals
| Gasket / Seal | Location | Material | Consequence of Failure | Typical Service Life |
|---|---|---|---|---|
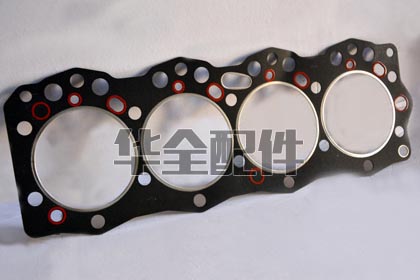
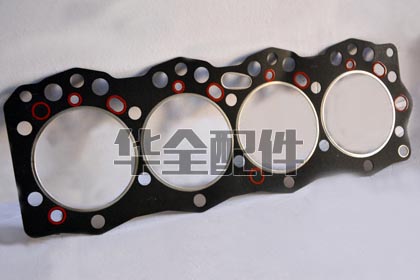
| Cylinder Head Gasket | Between cylinder head and engine block | Multi-Layer Steel (MLS), composite graphite, or copper | Compression loss, coolant-oil mixing, combustion gas in coolant — most critical gasket on the engine | 10,000-20,000 hours (replaced during overhaul) |
| Valve Cover Gasket | Between valve cover and cylinder head | Cork-rubber composite, molded rubber, or silicone | Oil leak onto hot exhaust manifold (fire risk), oil loss, dirt ingress | 5,000-8,000 hours; replace whenever valve cover is removed |
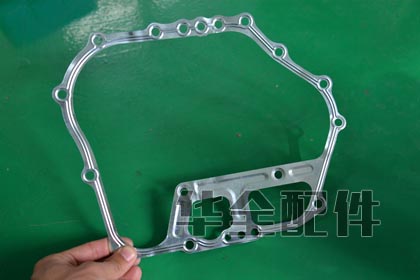
| Oil Pan Gasket | Between oil pan and engine block | Cork, rubber, RTV silicone, or molded rubber with steel core | Oil leak — if severe, can drain engine oil during operation | Replace during major overhaul or if leaking |
| Intake Manifold Gasket | Between intake manifold and cylinder head | Composite fiber, MLS, or molded rubber | Unmetered air entering engine: lean mixture, power loss, dust ingestion (cylinder wear) | Replace during overhaul or if intake manifold is removed |
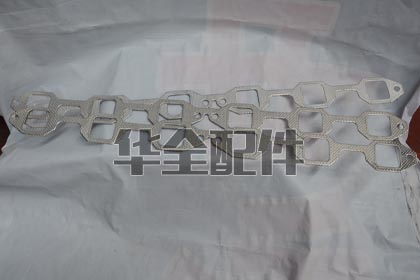
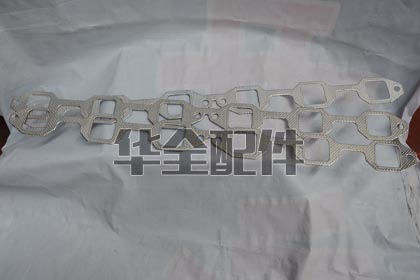
| Exhaust Manifold Gasket | Between exhaust manifold and cylinder head | Graphite composite, MLS, or solid copper | Exhaust leak: CO hazard in enclosed generator room, turbocharger underperformance | Replace whenever exhaust manifold is removed |
| Front Crankshaft Seal | At timing cover, sealing crankshaft nose | Spring-loaded nitrile rubber or PTFE lip seal | Oil leak onto drive belts (belt slippage, premature failure), oil loss | 15,000-25,000 hours; replace during major overhaul |
| Rear Main Seal | At rear of crankshaft, between block and flywheel | PTFE lip seal or rope seal (older engines) | Oil leak into flywheel housing; can contaminate clutch if equipped | Replace during major overhaul; difficult to access |
| Turbocharger Oil Drain Gasket | Between turbocharger and oil drain tube | Metal or composite gasket; sometimes O-ring | Oil leak onto hot exhaust — fire risk | Replace whenever turbocharger is removed |
Gasket Material Types and Selection
| Material | Temperature Rating | Pressure Rating | Best Applications | Limitations |
|---|---|---|---|---|
| Multi-Layer Steel (MLS) | Up to 1000°C (exhaust) | Up to 200 bar | Cylinder head gaskets, exhaust manifold gaskets | Requires very smooth sealing surfaces; unforgiving of surface imperfections |
| Graphite Composite | Up to 500°C | Up to 50 bar | Exhaust gaskets, high-temperature flanges | Brittle — cannot be reused; careful handling during installation |
| Nitrile Rubber (NBR) | -40°C to 120°C | Low | Valve cover gaskets, oil seals, O-rings in oil/coolant service | Degrades in contact with biodiesel >B20; swells in some synthetic oils |
| Viton / FKM | -20°C to 200°C | Low-Medium | High-temperature oil seals, turbocharger applications | Higher cost than NBR; poor low-temperature flexibility |
| PTFE (Teflon) | -60°C to 260°C | Low | Crankshaft seals, chemical-resistant applications | Very unforgiving of shaft surface finish; requires perfectly smooth shaft |
Frequently Asked Questions
1. Why does my new gasket leak immediately after installation?
The most common causes: (1) sealing surfaces not properly cleaned — old gasket material residue prevents proper sealing, (2) incorrect torque or torque sequence — especially for head gaskets, where bolt tightening order and incremental torque steps are critical, (3) gasket installed backwards or upside-down (many gaskets are directional), or (4) warped sealing surface not checked before reassembly (always check cylinder head and block deck flatness with a straight edge).
2. Can I reuse a gasket that looks intact?
As a general rule: no. Gaskets are designed to compress and conform to the specific sealing surfaces one time. Even if a gasket looks undamaged, the compressed fibers or embossed beads will not seal as effectively a second time. The few exceptions: solid copper exhaust gaskets can sometimes be annealed and reused, and MLS head gaskets from certain manufacturers are rated for limited reuse — but only if explicitly documented by the gasket manufacturer.
3. What is the difference between a gasket and a seal?
A gasket seals a static joint between two stationary surfaces (cylinder head to block, manifold to head, oil pan to block). A seal (oil seal, lip seal) seals around a rotating or reciprocating shaft (crankshaft seal, valve stem seal). Seals have a flexible lip that maintains contact with the moving shaft. The two should never be confused — a gasket cannot replace a seal and vice versa.
4. Should I use gasket sealant in addition to the gasket?
Follow the engine manufacturer’s instructions exactly. Many modern gaskets (MLS head gaskets, rubber-coated gaskets) are designed to be installed dry — adding sealant can actually cause leaks by preventing the gasket from seating properly. RTV silicone is appropriate on some applications (oil pan without a gasket, certain timing covers) but never apply RTV to a head gasket. When in doubt, install dry.
5. How do I prevent crankshaft seal leaks during installation?
Key practices: (1) ensure the shaft sealing surface is perfectly clean and free of nicks or grooves (use a Speedi-Sleeve if the shaft has a wear groove), (2) lubricate the seal lip with clean engine oil or the assembly lube specified by the manufacturer, (3) use the correct seal installation tool that drives the seal squarely into the bore — never hammer directly on the seal, (4) verify the seal is installed to the correct depth, and (5) protect the seal lip from sharp edges (keyways, splines) during installation using a seal protector or tape.
6. Can I use automotive gaskets on my generator engine?
Only if the generator uses an automotive-derived engine and the part numbers are identical. Many generator engines (Perkins, Cummins, John Deere) share base engines with industrial and automotive applications. However, generator-specific gasket sets may include extra gaskets for governor housings, different turbocharger configurations, or specific oil cooler designs not found on automotive variants. Always verify using the engine serial number parts lookup, not just the engine model.
Related Articles
- Generator Engine Parts — Systems Overview
- Generator Lubrication System
- Generator Exhaust System Parts
- Generator Turbocharger Parts
- Diesel Engine Spare Parts for Generators
- Generator Cooling System Parts
- Complete Generator Maintenance Guide
Product Gallery
Boling
Cummins
Various
Weifang
FAQ
Q: What are the critical gaskets and seals in a generator engine?
A: Critical engine sealing points: (1) Cylinder Head Gasket — the most critical seal, containing combustion pressures up to 200 bar and temperatures exceeding 2,000 degrees C at the fire ring. Failure causes compression loss, coolant-oil mixing, or combustion gas leakage; (2) Oil Pan Gasket — prevents oil leakage from the sump; (3) Valve Cover/Rocker Cover Gasket — keeps oil in the cylinder head area; (4) Intake and Exhaust Manifold Gaskets — prevent boost leaks and exhaust leaks respectively; (5) Front and Rear Crankshaft Seals — prevent oil leakage where the crankshaft exits the engine block. The rear main seal is particularly critical as replacement requires transmission/flywheel removal; (6) Oil Cooler Gaskets — failure causes oil-in-coolant or coolant-in-oil contamination; (7) Injector Sealing Washers/Copper Rings — seal combustion pressure at the injector-nozzle-to-cylinder-head interface. A leaking injector seal allows combustion gases into the fuel gallery and can erode the injector bore; (8) Turbocharger Oil Supply and Drain Gaskets — prevent oil leaks at the turbo connections.
Q: What materials are used in generator engine gaskets?
A: Gasket materials are application-specific: Cylinder head gaskets — multi-layer steel (MLS) with elastomeric coating for modern engines, or composite graphite-faced with steel fire rings for older designs. MLS gaskets withstand higher combustion pressures and provide better sealing than composite; Intake/exhaust manifold gaskets — graphite-impregnated stainless steel (high temp), or multi-layer embossed steel; Oil pan and valve cover gaskets — molded silicone rubber, nitrile rubber with steel core, or cork-rubber composite (older engines); Crankshaft seals — PTFE (Teflon) lip seals for high-speed, or fluoroelastomer (Viton/FKM) for high-temperature applications; Injector sealing washers — annealed copper or soft iron, designed to crush and conform to the sealing surface; O-rings — Viton (brown, high temp diesel/oil resistant) or nitrile/NBR (black, general purpose). Never substitute a nitrile O-ring where Viton is specified — it will harden and fail within 500-1,000 hours in high-temperature oil or fuel contact.
Q: Which engine brands’ gasket kits does HUAQUAN supply?
A: HUAQUAN supplies complete gasket kits (overhaul sets, top-end sets, and conversion sets) for: Cummins (4BT, 6BT, 6CT, ISB/QSB, ISC/QSC, ISL/QSL, ISM/QSM, ISX/QSX, KTA19/38/50, QSK23/45/60, NTA855), Perkins (1100, 1200, 1300, 2300, 4000 series), Deutz (912, 913, 1012, 1013, 2012, 2013), Volvo Penta (D5-D16, TAD/TWD series), MTU/Detroit Diesel (Series 60, 2000, 4000), Weichai (WP4-13, WD615/618, 12M26/33/55 series), Yuchai (YC4-YC6, YCK series), Shangchai (SC4-SC13, SC25/27), Weifang (4100-6126 series), SDEC, and most Chinese diesel platforms. Gasket kits include all gaskets, seals, and O-rings needed for the specified overhaul scope — eliminating the risk of missing a critical seal.
Q: What causes a cylinder head gasket to fail?
A: Cylinder head gasket failure causes: (1) Engine overheating — the #1 cause. When the engine overheats, the cylinder head expands more than the head bolts, compressing and crushing the gasket beyond its elastic limit. When the engine cools, the gasket cannot recover and loses clamping force; (2) Incorrect head bolt torque — either under-torque (insufficient clamping) or over-torque (bolt yield, loss of clamping force). Always follow the manufacturer’s torque sequence and torque-angle specification; (3) Head bolt thread issues — dirty, damaged, or non-lubricated threads cause false torque readings. The bolt ‘feels’ tight but actual clamping force is 30-50% below specification; (4) Liner protrusion out of specification — for wet-liner engines, the liner must protrude 0.03-0.15mm above the block deck. Too little and the fire ring doesn’t seal; too much and the gasket is locally crushed; (5) Pre-ignition or detonation — extreme combustion pressure spikes (over 200 bar) physically blow the gasket; (6) Corrosion — old coolant without corrosion inhibitors attacks the gasket material, particularly around coolant passages.
Q: Should I reuse a cylinder head gasket after removing the head?
A: NEVER reuse a cylinder head gasket. Once a gasket has been compressed (torqued), it has permanently deformed to conform to the specific surface imperfections of that head and block at that moment. Upon removal, the gasket’s fire rings and elastomeric coatings have taken a compression set and cannot re-conform. Reusing a gasket results in: (1) Combustion gas leakage between cylinders (cross-fire erosion); (2) Coolant and oil passage cross-contamination; (3) Reduced clamping force because the pre-compressed gasket thickness is now lower than specification. The $100-500 cost of a new head gasket is negligible compared to the $5,000-$50,000 cost of engine damage from a failed reused gasket. This applies equally to all critical gaskets — oil pan, intake manifold, exhaust manifold gaskets and all O-rings should be replaced whenever disassembled.
Q: What is the proper torque procedure for cylinder head bolts?
A: Proper head bolt torque procedure is CRITICAL — incorrect procedure is the #2 cause of head gasket failure after overheating. General procedure (always follow your specific engine manual): (1) Clean all head bolt threads with a thread chaser (not a tap — a tap removes metal). Wire brush bolt threads and lightly oil with engine oil or specified assembly lubricant; (2) Clean the block deck threaded holes — blow out with compressed air. Oil or debris in the bottom of a blind hole can hydraulically crack the block when the bolt is tightened; (3) Follow the tightening sequence — always from the center bolts outward in a spiral pattern. This pushes the gasket outward evenly; (4) Torque in 3-4 stages — typically 30%, 60%, 100% of final torque, then a torque-angle final step (e.g., 90 degrees + 90 degrees). The angle step provides more consistent clamping than torque-only; (5) Use a calibrated torque wrench — verify calibration annually; (6) For torque-to-yield (TTY) bolts — they are ONE-TIME USE ONLY. Replace with new bolts. Reusing TTY bolts results in insufficient clamping and potential bolt failure.
Q: How do I identify the correct gasket kit for my engine overhaul?
A: Gasket kit identification: (1) Determine your engine model and serial number from the data plate; (2) Identify the overhaul scope — Top-End Set (cylinder head gasket + valve stem seals + intake/exhaust manifold + turbo gaskets + injector seals), Conversion Set (Top-End Set + oil pan gasket + timing cover gasket/seal + front/rear crankshaft seals), or Full Overhaul Set (Conversion Set + all internal O-rings, seal rings, and ancillary gaskets); (3) Note any engine variant specifics — naturally aspirated vs. turbocharged engines may use different head gasket thicknesses. Engines with piston cooling jets have additional O-rings; (4) HUAQUAN provides illustrated parts breakdowns showing each gasket’s location for easy identification. Order by engine model and kit type — we ensure all gaskets are included. For critical applications, we also supply individual gaskets and seal kits for component-level repairs (water pump gasket, oil cooler seal kit, etc.).
Q: What is the difference between a composite and MLS head gasket?
A: Composite (graphite/fiber) head gaskets: constructed of a graphite-impregnated fiber core with a steel fire ring around each cylinder bore and steel armor around oil/coolant passages. Advantages: more forgiving of surface imperfections, better conformability on older engines with some deck erosion. Disadvantages: lower maximum combustion pressure tolerance, can delaminate if exposed to coolant leaks over time. Typically used on older engine designs and naturally aspirated engines. MLS (Multi-Layer Steel) gaskets: constructed of 2-5 layers of spring-tempered stainless steel, each embossed with sealing beads, coated with a thin (0.01-0.03mm) elastomer layer. Advantages: 3-5x the fatigue life of composite, withstands 200+ bar combustion pressure, consistent thickness tolerance (critical for injector protrusion on unit-injector engines). Disadvantages: requires very smooth surface finish (Ra 0.4-1.6 micron) — not suitable for worn/pitted decks. MLS is standard on all modern turbocharged and common-rail diesel engines.
Q: How do I prevent oil leaks from generator engine seals?
A: Oil leak prevention: (1) Maintain proper crankcase pressure — a clogged breather filter forces oil past seals. Check the breather system at every oil change; (2) Use the correct oil grade — oil that is too thin at operating temperature will leak past seals rated for higher viscosity; (3) Replace crankshaft seals at every major overhaul regardless of appearance — the lip seal wears a micro-groove into the shaft; (4) Apply RTV (room-temperature vulcanizing) silicone sealant sparingly and ONLY where specified — excess RTV squeezes out internally, breaks off, and clogs oil galleries; (5) Never install a lip seal dry — lubricate the seal lip with clean engine oil or assembly lubricant; (6) Use seal installation tools — hammering a seal in with a flat drift cocks the seal and damages the lip. Use a proper seal driver or a piece of PVC pipe matching the seal OD; (7) Inspect the shaft surface where the seal runs — a groove worn by the old seal requires a Speedi-Sleeve or shaft repair; a new seal on a grooved shaft will leak immediately.
Q: What are the signs of a leaking injector sealing washer?
A: Leaking injector seal symptoms: (1) ‘Chuffing’ sound from the injector area — combustion gas escaping past the seal; (2) Black carbon/tar deposits around the injector base; (3) Fuel or bubbles in the coolant — combustion gas entering cooling system through a compromised injector bore; (4) Reduced compression in that cylinder — a significant leak reduces effective compression; (5) Diesel smell in the engine oil — fuel leaking past the injector body seal into the cylinder head, then draining to the sump. This is dangerous — fuel-diluted oil loses lubricity and causes bearing failure; (6) Oil level rising — fuel dilution accumulates. A leaking injector seal not only affects performance — combustion gas leakage erodes the injector bore in the cylinder head, eventually requiring head replacement. Always replace the copper sealing washer and O-ring whenever an injector is removed.
Q: How should I store gaskets and seals to maintain shelf life?
A: Storage guidelines: (1) Store flat, not bent or folded — bending creates permanent creases that will leak when installed. Large gaskets should be stored in their original flat box or hung vertically; (2) Keep in a cool, dry environment — 15-25 degrees C, below 60% humidity. High heat accelerates rubber seal aging (ozone and UV attack); (3) Keep away from UV light — sunlight and fluorescent lighting degrade rubber seals. Keep in opaque packaging; (4) Silicone and rubber seals have a 3-5 year shelf life — rotate stock using FIFO; (5) Metal gaskets (MLS, embossed steel) have near-indefinite shelf life if kept dry; (6) Composite/graphite gaskets have 5-7 year shelf life — the binder material slowly oxidizes; (7) Never stack heavy objects on gasket packages — it compresses the gasket’s embossed sealing beads. Before using any stored seal, check for hardening (press with fingernail — it should leave a temporary mark in flexible rubber), cracks, or corrosion on metal gaskets.
Q: What is an overhaul gasket kit and what does it include?
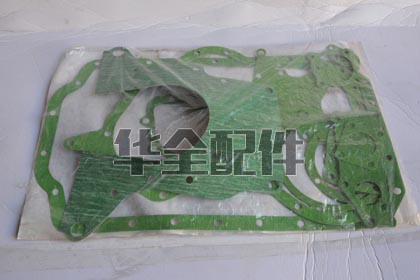
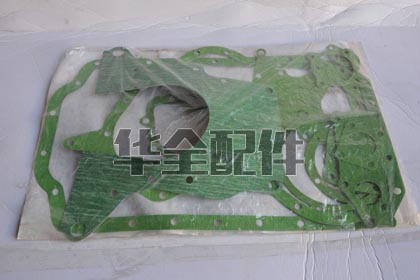
A: A Full Overhaul Gasket Kit (also called a Master Gasket Set or Complete Gasket Set) includes every gasket, seal, and O-ring needed for a complete engine teardown and rebuild: (1) Cylinder head gasket; (2) Valve stem seals; (3) Intake and exhaust manifold gaskets; (4) Turbocharger mounting and oil line gaskets; (5) Oil pan gasket; (6) Timing cover gasket and front crankshaft seal; (7) Rear crankshaft seal and housing gasket; (8) Water pump gasket; (9) Thermostat housing gasket; (10) Oil cooler/filter housing gaskets; (11) Injector sealing washers and O-rings; (12) Fuel pump and lift pump gaskets; (13) All internal O-rings — oil pickup tube, piston cooling jets, oil pressure relief valve, and coolant tube connections; (14) Rocker cover/valve cover gasket. The kit typically excludes: crankshaft main and rod bearings, piston rings, and cylinder liners — these are sold separately as the ‘overhaul parts kit’ or individually.
Q: How do I diagnose a blown head gasket without disassembling the engine?
A: Non-invasive diagnosis methods: (1) Cooling system pressure test — pressurize to radiator cap rating (typically 1.0-1.5 bar) and check for pressure drop. A leak into a cylinder shows as a slow, steady pressure loss; (2) Combustion gas test (block tester) — uses a chemical fluid that changes color (blue to yellow) when exposed to combustion gases drawn from the radiator filler neck. This is the definitive test for combustion-to-coolant leaks; (3) Bubbles in the radiator — with the radiator cap removed (COLD engine), start the engine and watch for continuous bubbling in the coolant. Occasional air pockets are normal; a steady stream of bubbles indicates combustion gas entry; (4) Cylinder compression test — adjacent cylinders with significantly lower and nearly identical compression indicate a blown gasket between these cylinders; (5) Oil appearance — milky/chocolate-milk colored oil indicates coolant-oil mixing (head gasket or oil cooler failure); (6) Coolant appearance — oily film or sludge in the coolant indicates oil entry; (7) White smoke from exhaust (steam) and coolant loss with no visible external leak. Any one of these symptoms warrants further investigation; multiple symptoms together confirm head gasket failure.
Q: Can liquid gasket sealers or stop-leak products fix a leaking gasket?
A: We strongly recommend AGAINST using stop-leak products in generator engines. These products circulate particles that accumulate at the leak point and ‘plug’ it. However, they also: (1) Clog radiators, heater cores, and oil cooler passages — permanently reducing cooling capacity; (2) Settle in the thermostat, causing it to stick; (3) Accumulate in the water pump seal, causing premature failure; (4) Deposit on cylinder walls (if blown into a combustion chamber), causing accelerated ring and liner wear; (5) Contaminate the entire cooling system, requiring a complete system flush and component replacement to fully remove. Stop-leak is a roadside emergency measure to get a vehicle home — it has no place in industrial generator maintenance where reliability is paramount. A failed gasket must be replaced with a new, correct-specification gasket following proper installation procedures. The temporary fix becomes a permanent problem.
Q: How do I ensure a leak-free oil pan gasket installation?
A: Oil pan gasket installation best practices: (1) Clean both mating surfaces meticulously — any oil residue prevents proper adhesion of sealant; (2) Check the oil pan flange for flatness using a straightedge — bent flanges from over-tightening are common. Straighten with gentle hammer and dolly work; (3) Apply RTV silicone at the corner joints (where the timing cover and rear seal housing meet the block) — these 90-degree transitions are the most common leak points; (4) If using a cork or fiber gasket, apply a thin, even coat of gasket adhesive to one side only — too much adhesive squeezes out and contaminates the oil; (5) If using a molded rubber gasket with crush-limiting inserts, install it dry or with a very thin RTV film at corners only — rubber gaskets are designed to seal without sealant; (6) Tighten bolts from the center outward in a criss-cross pattern, in 2-3 stages to final torque (typically 10-25 Nm — check your specific engine); (7) Wait 24 hours after assembly before filling with oil if RTV was used — it cures fully in that time. Filling too early causes the still-soft RTV to wash out.